AdminPlus
In addition to areas already exposed via the current Admin role, further access will be provided in these areas for AdminPlus users:
- Fields
- Field Relation
- Screens
- Emails
- Help Page (to upload Help documents)
Note: Any user assigned to the role of Admin will be able to see these areas of the system. Users are NOT upgraded to the Super Admin role. Contact your CSM for more information on the AdminPlus upgrade.
Fields
Within fields, you have the following abilities:
- Add/Edit/Delete manually managed fields and any associated values
- Update Current System fields
-
The RUX form in the portal will display the sort/order of the values saved here
- View all existing fields and associated values
- Decipher which fields on a which platform screens
- Enable AI tools and validation for the HTML-Text Area control type in RO and RUX, as well as for Textarea control types in RUX, to ensure AI options and score validation are activated for all applicable fields.
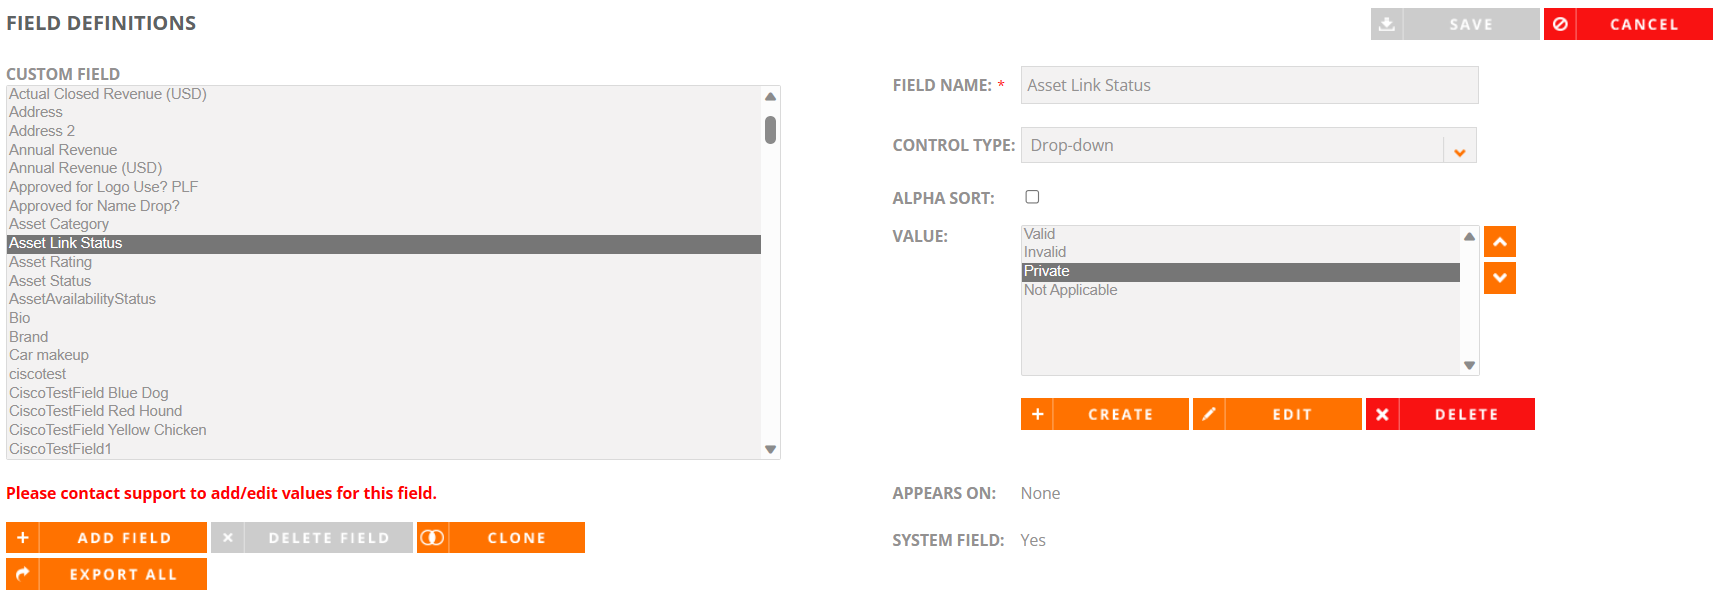
- Click the Administration icon and select Fields.
- Click Add Field.
- Enter a Field Name.
- Select a Control Type from the drop-down menu:
Checkbox: This is a YES/NO field.
- Drop-down: You can enter as many associated values as needed; however, this is a single select field.
- Click Create to add an associated Value picklist. The "Field Value" dialog will appear.
Enter a Field Value and click Save.
(Optional) Select the Alpha Sort checkbox to sort by alphabetical order. If Alpha Sort is NOT selected, you can sort the drop-down list as desired.
- Click Save.
HTML-Textarea: This adds a HTML text box to any screens like Requests, Nominations, etc to format the content. To learn more, refer to HTML Control Type.
- Multi-select: Enter as many associated values as needed and select as many associated values.
- Click Create to add an associated Value picklist. The "Field Value" dialog will appear.
- Enter a Field Value and click Save.
- (Optional) Select the Alpha Sort checkbox to sort by alphabetical order. If Alpha Sort is NOT selected, you can sort the drop-down list as desired.
- Click Save.
- Section Header: This breaks a form or page into sections.
- Textarea: This is an unlimited text area.
- Textbox: This text field is not limited specifically to text only.
- Select a Data Type from the drop-down menu: Currency, Dates, Numbers, URL, Time, Text.
- Enter a text character Max Length. The default is 300 characters.
- Click Save.
- Select the field name that you wish to edit.
- If you are editing the title, update the Field Name and click Save.
- To edit a field value or a picklist, click Edit under the Value field and click Save.
- Select the field name that you wish to delete.
- Ensure that the field does NOT exist on any screens by:
- Check the Appears On area.
- Remove that field from all associated screens by highlighting the field in the list and clicking Delete Field.
- Once the desired field has been removed from all associated screens, click Delete Field.
- To delete a field value, select the Value in the drop-down menu and click Delete.
Note: System fields that have associated Values can be updated by customer. System fields that exist on screens per RO Platform cannot be removed without the assistance of Upland developers.
Field Relation
Field Relationships allow you to establish the Parent/Child relationship between your manually managed fields.
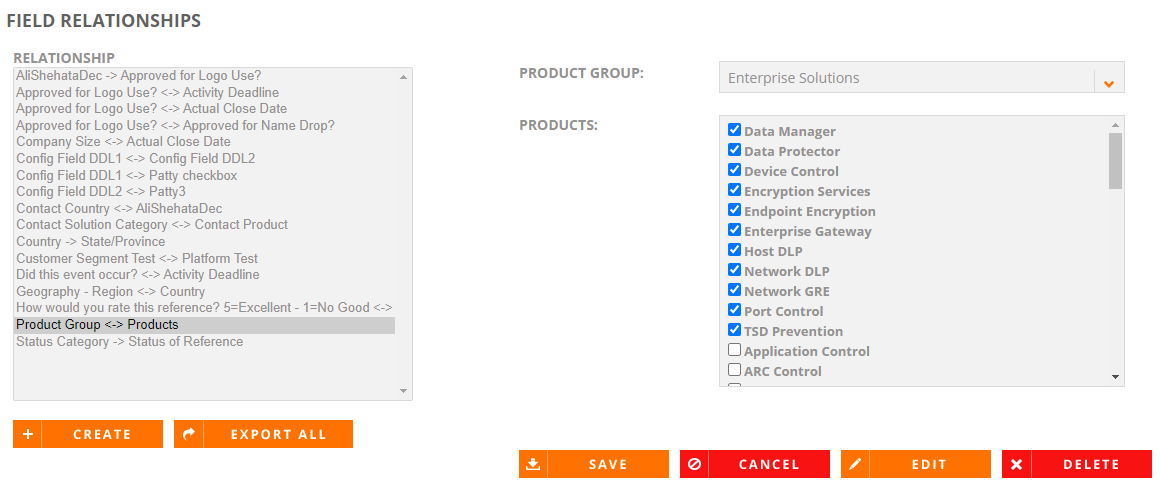
- Click the Administration icon and select Field Relation.
- Click Create. The "Create Relationship" dialog will appear.
- If desired select the Visibility Relationship? checkbox. Visibility relationship is a 1 to 1 relationship, which will most likely not be needed as majority of Parent/Child relationships tend to be one to many relationships, in which case, select the One to Many Relationship? checkbox.
- Select the Relationship From and Relationship To from the drop-down menus.
- Click Save.
- Once saved, on the right side of the screen the Parent Field appears on top and the associated Child Fields to select from appear below. Select The desired Parent Field from the drop-down menu.
- Select the desired Child Fields and click Save.
Note: When a new Parent/Child relationship has been established, there is no longer the ability to select those “children” when creating a new relationship. The selections will be grayed out.
- Click the Administration icon.
- Select the Field Relation you want to edit. The "Edit Relationship" dialog will appear.
- Once you've finished editing your Field Relationship, click Save.
- Click the Administration icon.
- Select the Field Relation you want to delete.
- Click Delete.
Screens
Within Screens, you can configure system screens at the following levels:
- Customer
- Content (Assets)
- Nominations
- Report Builder
- Request
- Search
- Spotlights
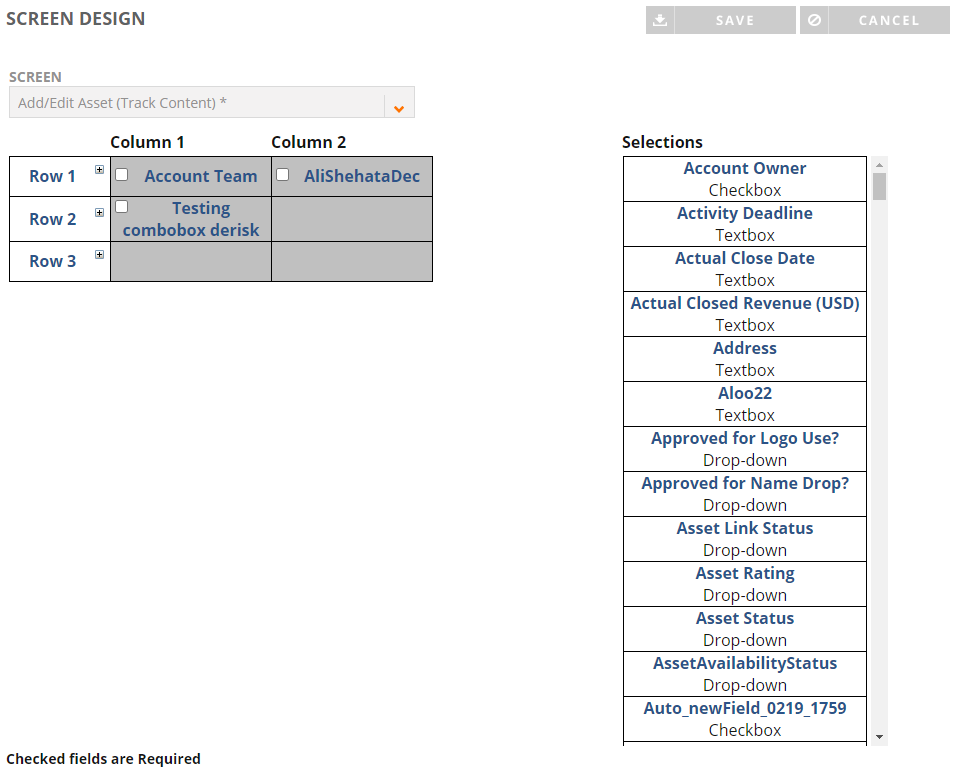
- Locate the screen you want to edit by either entering search text or searching the drop-down Screen menu.
- Build your Screens by dragging and dropping.
- Field selections can be found in the left-hand column.
- Fields are created in a left to right fashion from Row 1 to Row 2 on the screens grid. Fields are removed in the same manner.
- Checkboxes will assign required fields to users. These required fields will have an asterisk
- Click the + sign to create another row.
- Click Save.
Caution: There are specific screens that are designated with an asterisk; this means those specific screens must be configured first.
Note: Search screens are broken out between Customer-specific and Content-specific fields. Search screens are broken out between Reference Manager/Admin views vs. Portal User views.
Emails
Within Email Setup, you have the ability to wordsmith all system emails how you see fit. Emails are comprised of merge fields, which dynamically populate with values from the customer system. To learn more about which fields are available, please see the System Email Merge Fields article in the Community.
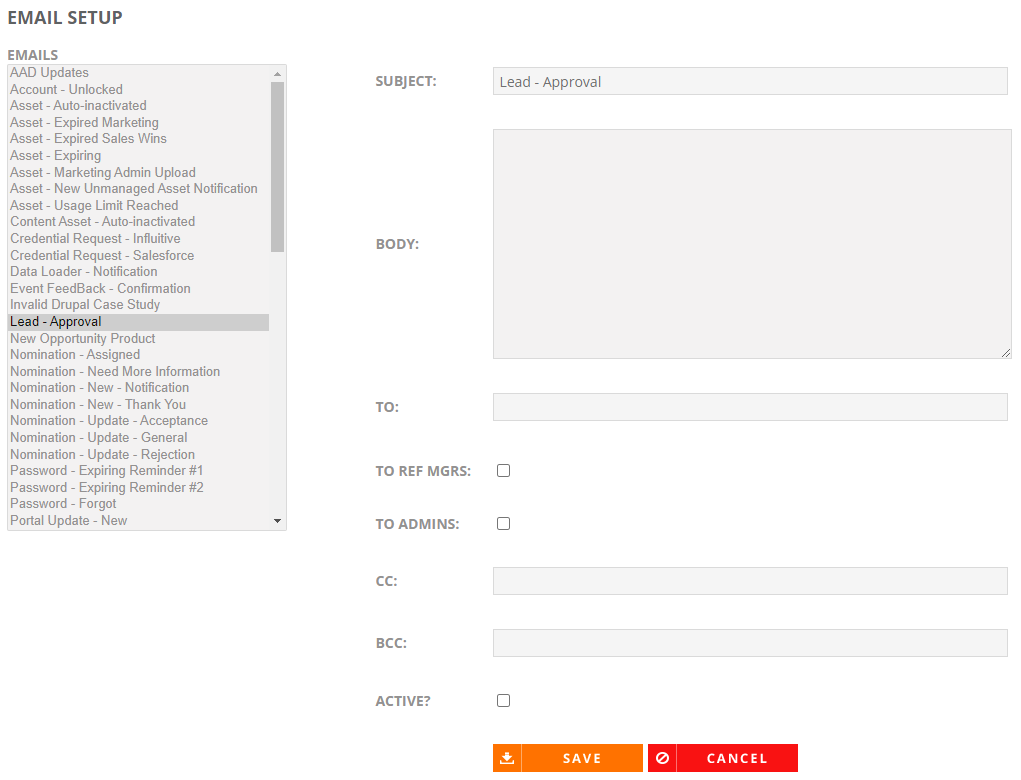
- Select the desired system Email(s).
- Update the system email Subject and Body areas as desired.
- Select the email recipients.
- Some system emails have a predetermined recipient. This will be defined.
- Emails that do not have a designated recipient can be assigned in multiple ways:
- You can select to send to all Reference Managers and/or Admins by selecting the To Ref Mgrs and/or To Admins checkboxes.
- You can assign to a specific user via the To field. This is a static email address.
- You can CC / BCC a specific user via the CC and/or BCC fields. This is a static email address.
- Ensure that any emails you wish to send are active by selecting the Active? checkbox.
- Click Save.
Help Page
Within the Help Page Administration, you have the ability to load all Help materials for your users. Additionally, the ability to remove any outdated materials.
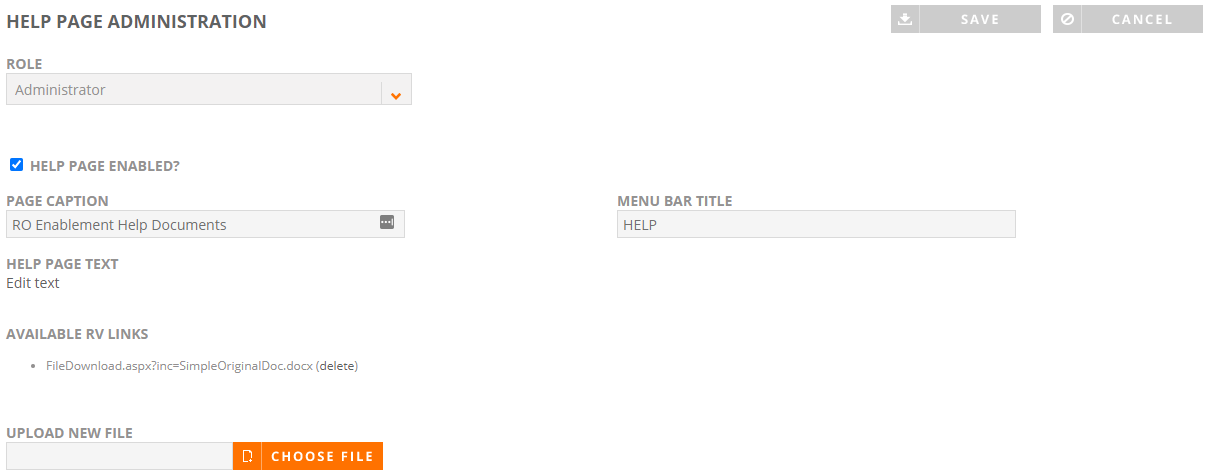
- Load help materials according to user Role.
- To add any files, click the Choose File button within the Upload New File section.
- To delete any outdated files, click the (delete) link in the list of Available RV Links.
- Click Save.
Example: If there are materials specifically designed for Portal users, select the Portal User Role from the drop-down menu.
Note: Files can be documents (PDF is recommended) and videos.